LELE – 925 silver elephant pendent with a hand worked Vicenza stone body
by massimoruaro on Nov.15, 2009, under Handmade Jewelry

LELE - 925 silver elephant pendent with a hand worked Vicenza stone body
In June I launched my collection in Silver and Vicenza stone works. Recently I was fascinated by a thought which came to me, on using the same for the animal world and the jungle. I created a series of animals such as elephant, panther, snake and others. So here I launch my new Jewelry line called – LELE.
This particular piece is a 925 silver elephant pendent matched to a hand worked Vicenza stone body.
Black & Purple pearl earrings with brass
by Maura Nicholson on Nov.15, 2009, under Handmade Jewelry
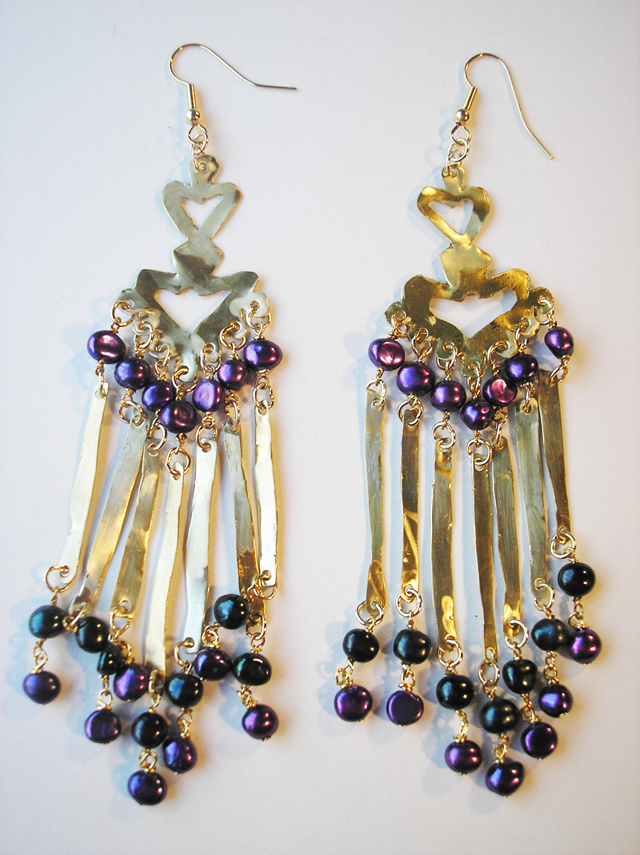
Black & Purple pearl earrings with brass
These are from my new collection ‘Love Hurts’ its all hand cut brass heart shapes and dark colours. I love these black pearls and scrumptious purple pearls. Check them on my website.
Beautiful Bridal Necklace Set with Emerald and Diamonds in Yellow Gold
by Shilpee Nagota on Nov.15, 2009, under Jewelry Designs
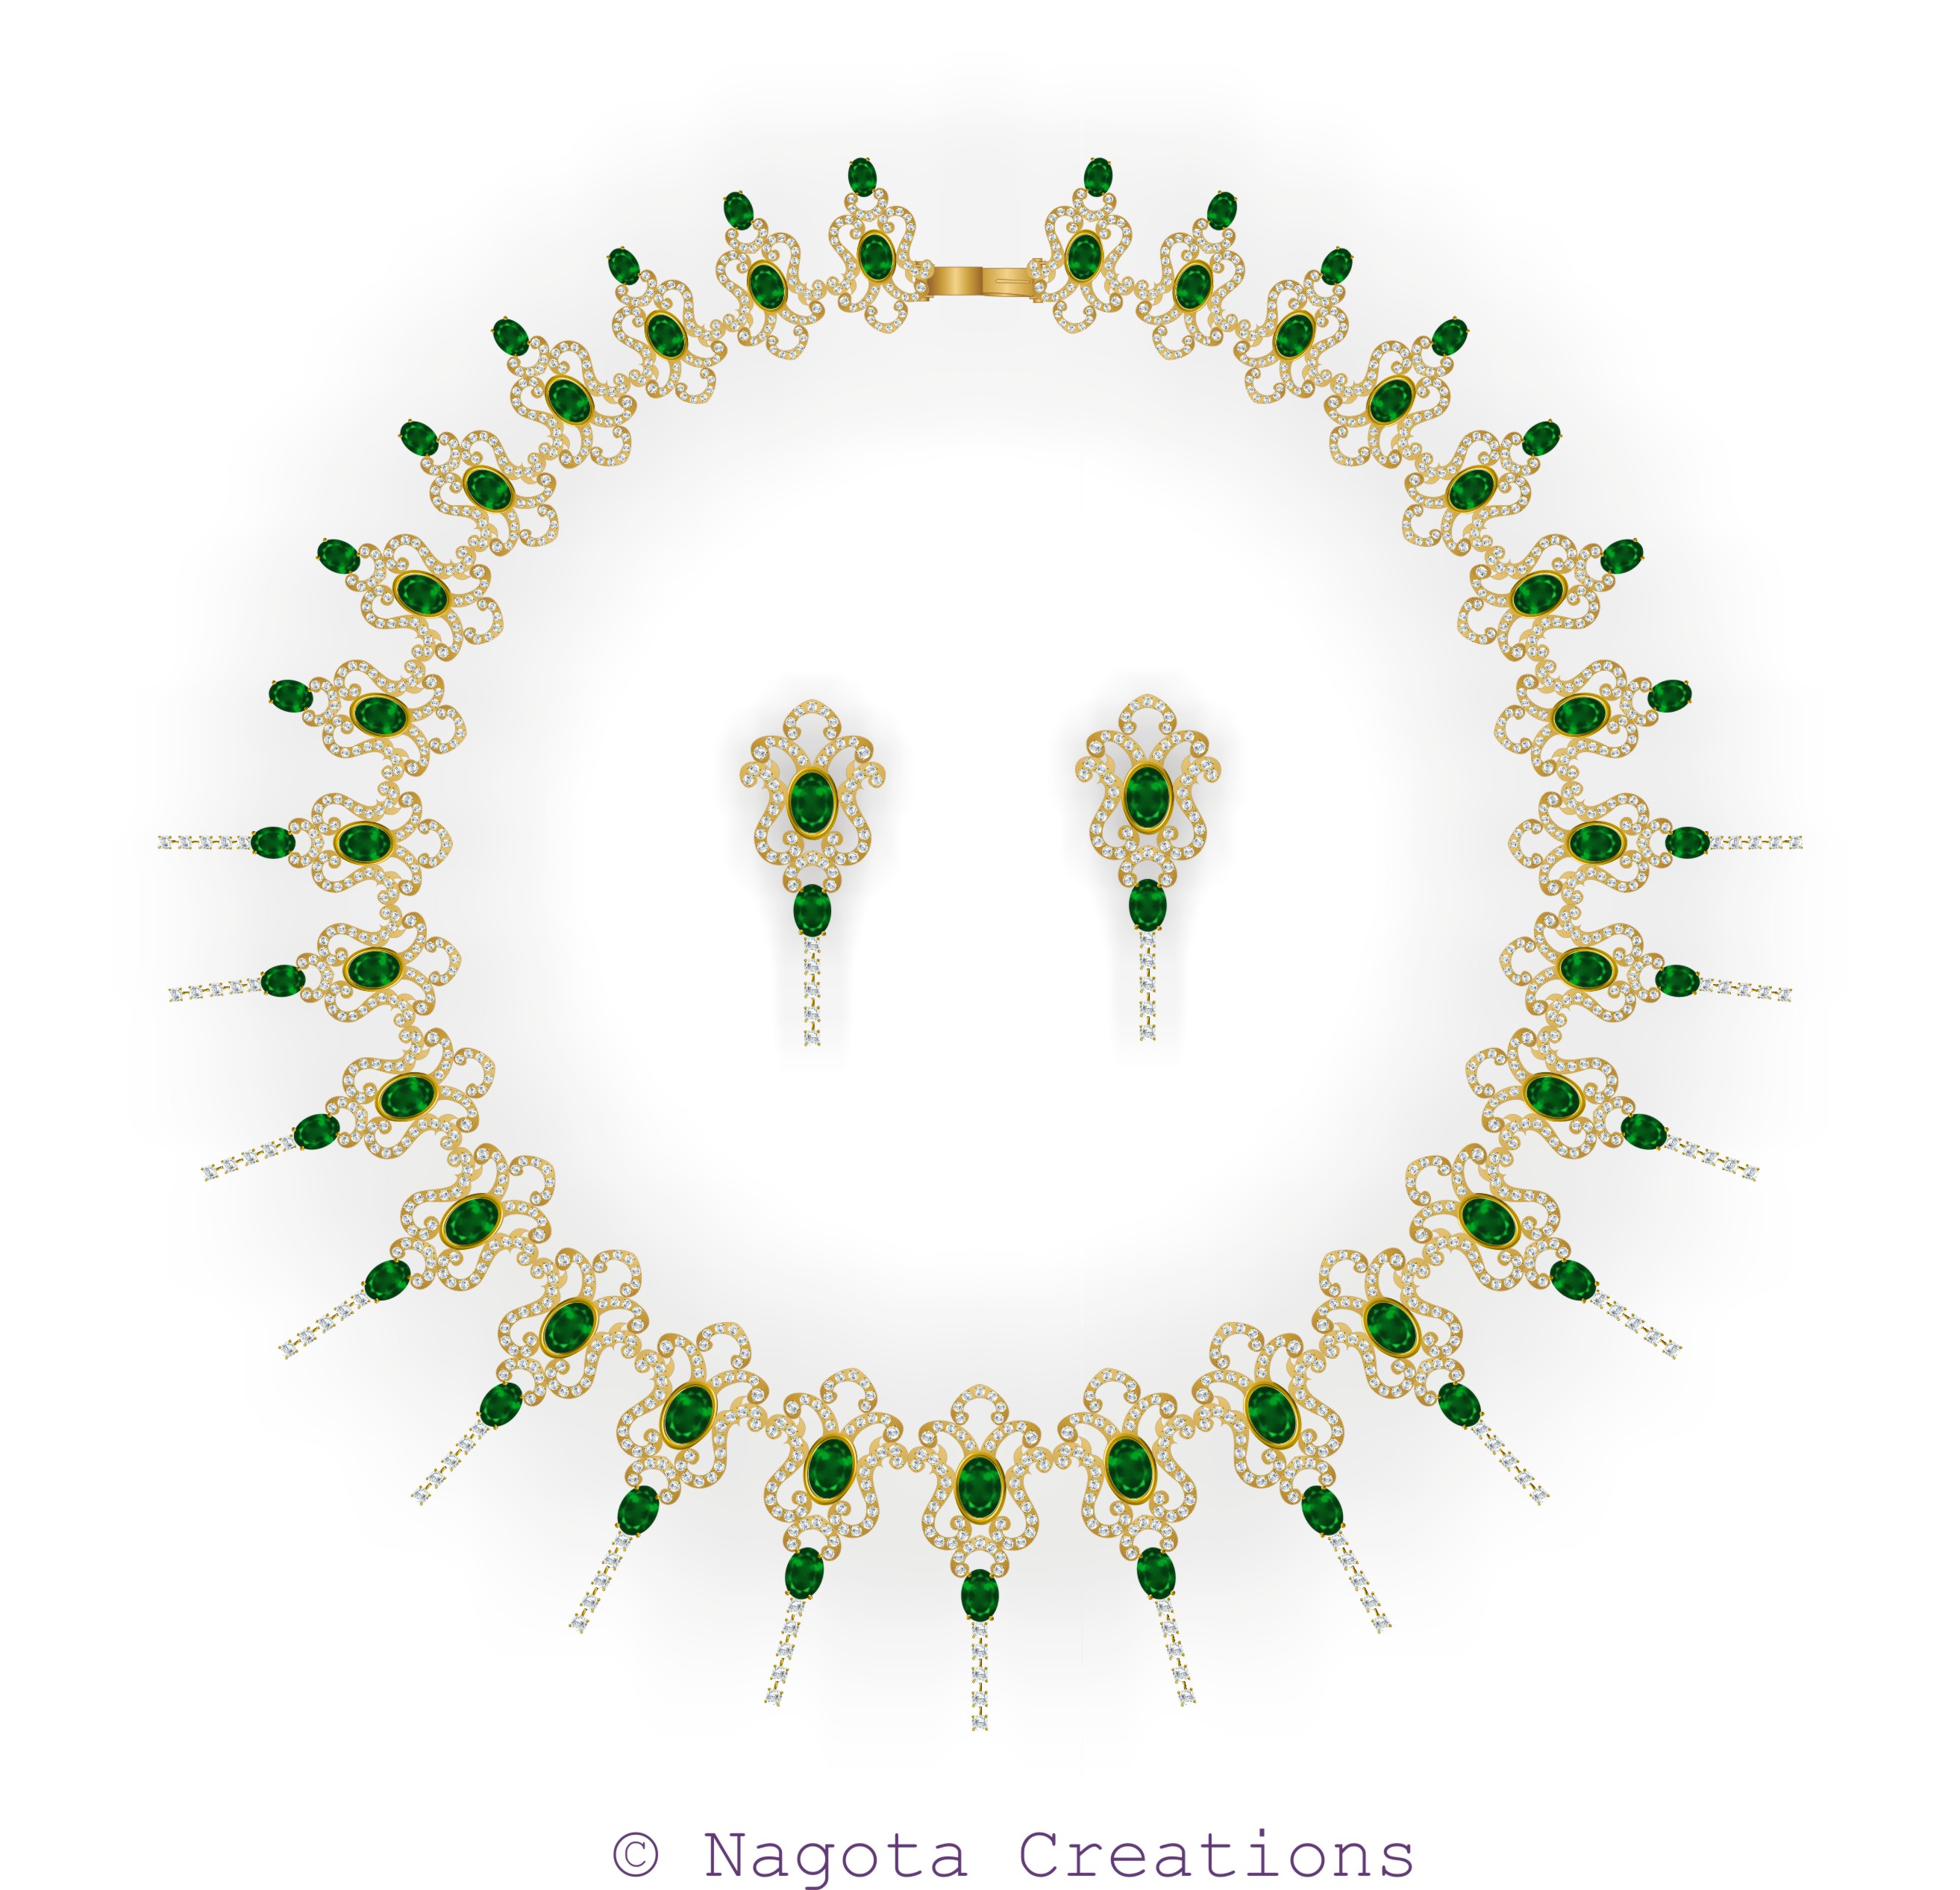
Beautiful Bridal Necklace Set with Emerald and Diamonds in Yellow Gold
- Product name :- Bridal Necklace Set
- Style of Jewelry :- Bridal , Traditional
- Metals used :- Yellow Gold
- Settings used :- Prong & Bezel in Emerald and Prong & Pave in Diamonds
- Stones used :- Emerald and Diamonds
To know more about us please visit www.nagotacreations.com
Diamond ring in yellow gold
by Shilpee Nagota on Nov.15, 2009, under Jewelry Designs
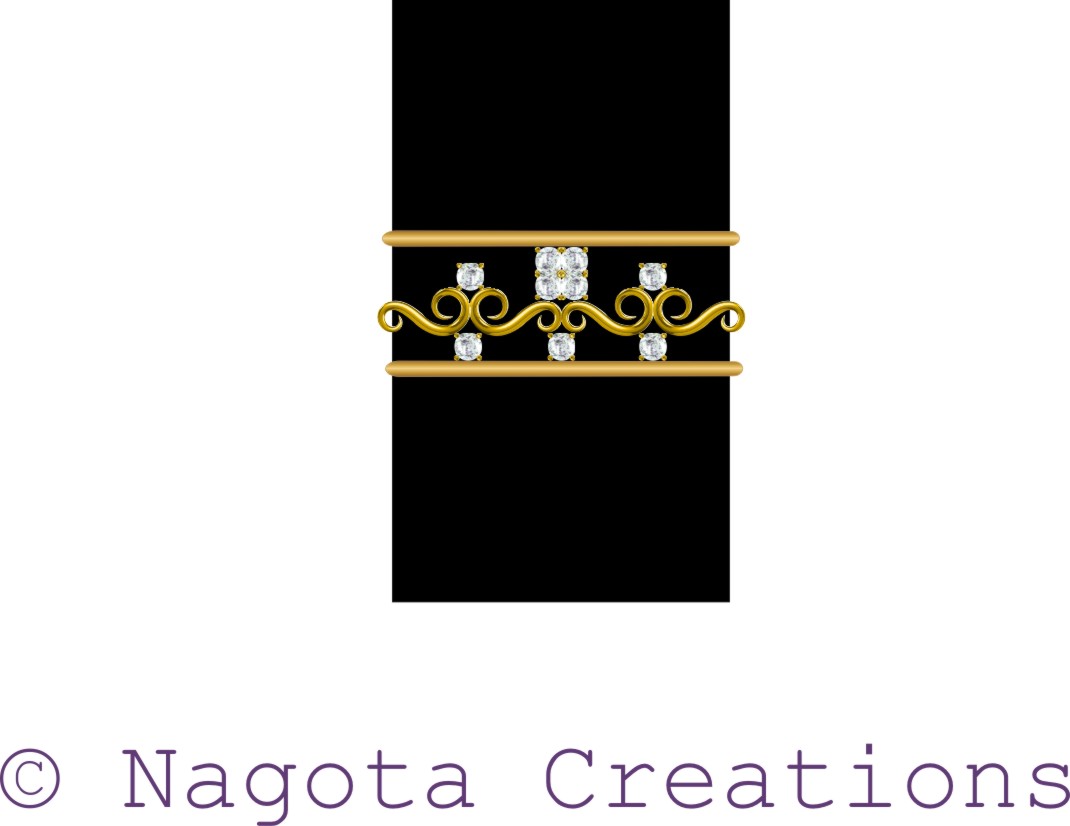
Diamond ring in yellow gold
- Product name :- Ring
- Style of Jewelry :- Traditional and Daily Wear
- Metals used :- Yellow Gold
- Settings used :- Prong in Diamonds
- Stones used :- Diamonds
To know more about us please visit www.nagotacreations.com
Metalsmithing – Thats how I made a Green Amethyst Dome Ring !!
by karla on Nov.14, 2009, under Jewelry Making
This is the ring that I imagined in my head. What I plan for is not always what I end up with, but any problems often turn into happy mistakes and turn the piece into something that I never imagined. However….this time, it came out almost exactly how I pictured it in my head!!

It finished up in a rather large silver domed ring with a checkerboard cut green amethyst set on one side. Yep, it’s kind of obnoxious in its awesomeness.

This is what I started with- a sheet of 20 gauge sterling silver, two sizes of fine silver bezel wire, square wire for the band (not pictured) and a 12 mm cushion cut green amethyst.

I like to get all of the pieces ready at once before constructing anything. I got the wire into the basic shape and size I would need it and sawed it off.

I sawed out the circle, this metal was a little too thick for my Joyce Chens, so I had to saw it, but it wasn’t that painful and I think I made it all the way around with one blade. OK, so maybe two. For those of you who may be asking who or what is a Joyce Chen? They are kitchen shears that were designed to cut through chicken bone, so they work wonders on thinner gauged metal. You have to watch your fingers because if it can cut through chicken bone I would have to imagine it would cut through a finger. They can be found at pretty much any kitchen supply store.

While I am preparing things, I select my outside bezel wire size. It should be slightly higher than the height of the table (top of the stone) to culet (bottom of the stone). Wrap it around the stone and cut it to the correct size, it should be snug but not tight. At this point, don’t worry about the shape of the band or the bezel, we just need to get the size down. It is shaped after soldering.

So on to the soldering. I like to try to do as many things at once as I can, some call it efficient, some call it lazy.. whatever. This round I will be soldering the band and the outer bezel shut. Since I am at the torch, I will also anneal the silver disk so it is easier to dome. Annealing metal is a controlled heating to make it more malleable and ductile.

After everything is soldered, I bring it to the mandrel and hammer it round with a rawhide hammer. I can also slightly adjust the size of the band during this time if I need to, but I don’t because this fits my finger perfectly! And half of the people at the studio as I find out by them all commenting, “Oh you shouldn’t have….and look….it fits perfectly…”

Once the ring is round and the correct size, I move over to the hammering area (P.S. this is my favorite area, who doesn’t love to attack a piece of metal with a hammer? Great stress relief!) Start with a shallow dome and work your way slowly to the depth you want. The block pictured above has multiple sizes I just kept rotating the block until I got to the depth I wanted. This can also be done on the anvil. If you go too fast there is a good chance you will wrinkle your metal, and no one likes wrinkled metal, well, unless you do. That can be made to look really good, but I have a plan and I am sticking to it!
Now on to the second part of a step bezel. We have the outside together and now we need to shape it to our stone. This is very easy if it is a common shape and you can use a bezel mandrel, but I tend to be drawn towards the unnecessarily difficult, and this is a rounded square. I used the round mandrel to get the basic shape then moved over to the square to get corners, but the corners are not real points so be careful to not hammer too hard and create 90 degree corners. The shape still wasn’t right so out come the pliers. At this point, all you can do is work with it and try to convince it that it wants to be the same shape as the stone.
You can also put the stone in the bezel and kind of roll it around on the table, but beware; this can stretch the bezel, so roll gently. Once you have determined that it is the right size and have it in the right shape, take the second size of bezel wire, which is slightly shorter than the first, and cut it so it fits snug inside the outer bezel. Repeat the steps above for the inside bezel.

This picture is from midway through the shaping process. You can also see that the outside bezel is WAY too high; this will be filed down later.

Here is the dome soldered onto the band, both pieces of the step bezel and the stone. Dosen’t the ring look kind of cool just like this? I almost got sidetracked and said, “Voia-La, its done!” But then I looked at the shiney, pretty stone and kept going.

Put the step bezel together and place it on the dome, I had to do some slight filing to get the bezel to sit inside of the dome without any gaps, so I like to mark an X on the ring and on the bezel, trace the shape for placement, as well as an arrow pointing to the top. It sounds silly, but you would not believe how many times I have gotten everything perfect then spent 30 minutes trying to figure out how the parts fit back together. The stone is just placed there to make sure everything is level, sits right and is pretty :-)

Now that everything is soldered together, you’re thinking…that’s one mighty fine ring, and look it’s almost done. You are so wrong. While yes it does look put together, there is still so much to be done. In case you have never met Firescale, let me introduce you. Lovely jewelry aficionados meet Firescale, she’s a $(@#&. The best way of describing firescale is one of those movies where the happy go lucky main character is going along with their life, then BAM someone shows them something, whether it is a hell dimension, a video tape, or insert your own movie reference here, and you will never be the same.
The Wikipedia definition of firescale is this, “firescale, is a red or purple stain that appears on mixtures of silver and copper, such as sterling silver. At high temperatures, oxygen mixes with the copper to form cuprous oxide and then cupric oxide.”
As a beginner, it will be hard to see it, people will say, “Look, there it is,” and you will see nothing but beautiful shiny silver…..but then one day there it is. A shadow that doesn’t move when you move the piece around in the light…..You have been forever changed.
You can prevent firescale to some degree with flux or other special anti-firescale items and pickling after heating. You can also try to replace Oxygen with Hydrogen or ammonia, but seeing as how breathing is rather important I haven’t figured out how to do this one yet. So instead you sand, and sand, and sand, and grind, and file, and sand. When you think you are almost done, you are probably only half way there. The way I get myself through these times is by asking myself, “Do I want this piece to be mediocre or fantastic?”

One tip: Firescale is more visible when it is humid or wet, so get your piece wet if you want to make sure you got every last sneaky shadow.

Now it is time for setting the stone. Lay everything out so it is within reach because once you get started, it’s annoying to have to get up because you forgot your burnisher in the cabinet. I try to not use the pusher because there is more of a chance of causing lines in your bezel, so I start with the rocker. When positioned push down and in with a side to side rocking motion. The bezel should be soft from the heatings so it should not require that much muscle (yet) since there are slightly rounded corners. I slightly filed the corners so they would lay better.

Once you have the stone in place and everything looks good, start with getting the bezel to lay flat and completely encompass the stone. The bezel is a little too high for my liking, but by the time I realized this, I was already to the point of no return, so I will have to get over it. When you have done all you can with the rocker and the stone is in there and not coming out, grab your burnisher and have at it. I hold it like a pen at a 45 degree angle from the stone. This smoothes out the bumps and should make the setting look uniform.
I chose a brushed silver finish because when it was at a high polish the stone kind of disappeared, so I cleaned up any dings made while setting the stone and then did a few rounds with the scotch bright and steel wool.

Ta-Daaaaa, here it is. When finished I asked someone to crack my back, went home, made myself a drink and went to bed.
Long article right? But I hope you found it interesting and informative to read as much as I loved to write. So thats was my story, on how I made this beautiful ring I had in mind. You can check my etsy shop for more stuff I keep making.
-
Hi! Welcome to JewelStruck Blog!
Thanks for dropping by! Feel free to join the discussion by leaving comments, and stay updated by subscribing to the RSS feed. See ya around!
Subscribe Us!
